How to Create Beautiful Backlit Images in Newborn Photography
Backlit images are some of the most beautiful photographs you can create in newborn photography. They have a softness and an intimacy that is completely different from any other lighting setup and parents absolutely love them.
The good news is that you do not need complicated equipment or a studio full of lights to create them. Here is exactly how I do it in simple straightforward steps.
Think of a Large Window Covered in White Fabric
The easiest way to understand backlit photography is to imagine a large window covered with white fabric. Your light source is on the other side of that fabric shining through it. Your subjects stand in front of it. You stand in front of your subjects. That is the entire concept.
You can use any light source to achieve this effect. Natural daylight coming through a window works beautifully. Flash units work well too, either portable speedlights or larger studio monolights. LED lights are becoming increasingly popular and work just as effectively. The light source itself matters less than how you use it.
Soften the Light
If you were to shine your light source directly into your camera lens the effect would be deeply unpleasant. Think of someone shining a torch directly into your eyes. That is not what you are going for.
To soften the light you need something opaque and white between your light source and your subjects. I use white voile curtains. They are inexpensive, easy to hang and work beautifully. The more layers you use the softer and more diffused the light becomes. You can add layers by hanging several curtains one behind the other, by bunching a single curtain up to create more density, or by doing both. Experiment until the light feels soft and pleasant rather than harsh and direct.
The light passing through the white voile becomes softer and more gentle. You do not need any technical knowledge to see when it is working. If it looks beautiful it is working.
Bounce the Light Back
Here is where it gets slightly more interesting but please do not let it worry you.
If you simply turn your light source away from shining directly into your lens the light will illuminate whatever it is pointing at and will not pass through your soft curtains onto your subjects. To make it work you need to bounce the light back.
Think of the light coming out of your light source as a tennis ball. If you throw that ball in a straight line at a wall it will bounce off and travel in a new direction. Light works in exactly the same way. Point your light source at a white wall and let it bounce back through your curtains onto your subjects.
Your wall must be white. It can be an actual white wall, a large piece of white card, a white photographic reflector or even a large white sheet or blanket. When I used to photograph weddings I would sometimes ask the groom to stand close to the bride on the shadow side. His white shirt would bounce the light from the window back onto the darker side of her face. Simple, effective and completely free.
You do not need a complicated multi light setup. I almost always work with one single light source and sometimes a little bounced light. That is all.
Bouncing the light and diffusing the light work best together and if you can do both you will get the most pleasing result. That said if you can only do one or the other you can still create a beautiful image as long as you are careful with how you position yourself and your subjects in relation to the light.
If you are shooting with natural daylight coming through a window you can only diffuse the light, you cannot bounce it in the same way. This will still work well but choose your window carefully. A window with soft even daylight rather than direct sunlight streaming straight through will give you a much more manageable and flattering result. Time of day matters too. Harsh midday sun through a window is very different from the softer light of early morning or late afternoon.
Position Your Subjects and Yourself
Place your subjects in front of your white curtain with the light source behind it. You then stand in front of them. The order from back to front is light source, curtain, subjects, you.
This is where most photographers go wrong and it is the most important practical point in this entire post.
Do not simply turn your subjects so their backs are to the light. If you do this the light will fall on their backs and there will be no light on their faces at all. The image will not work.
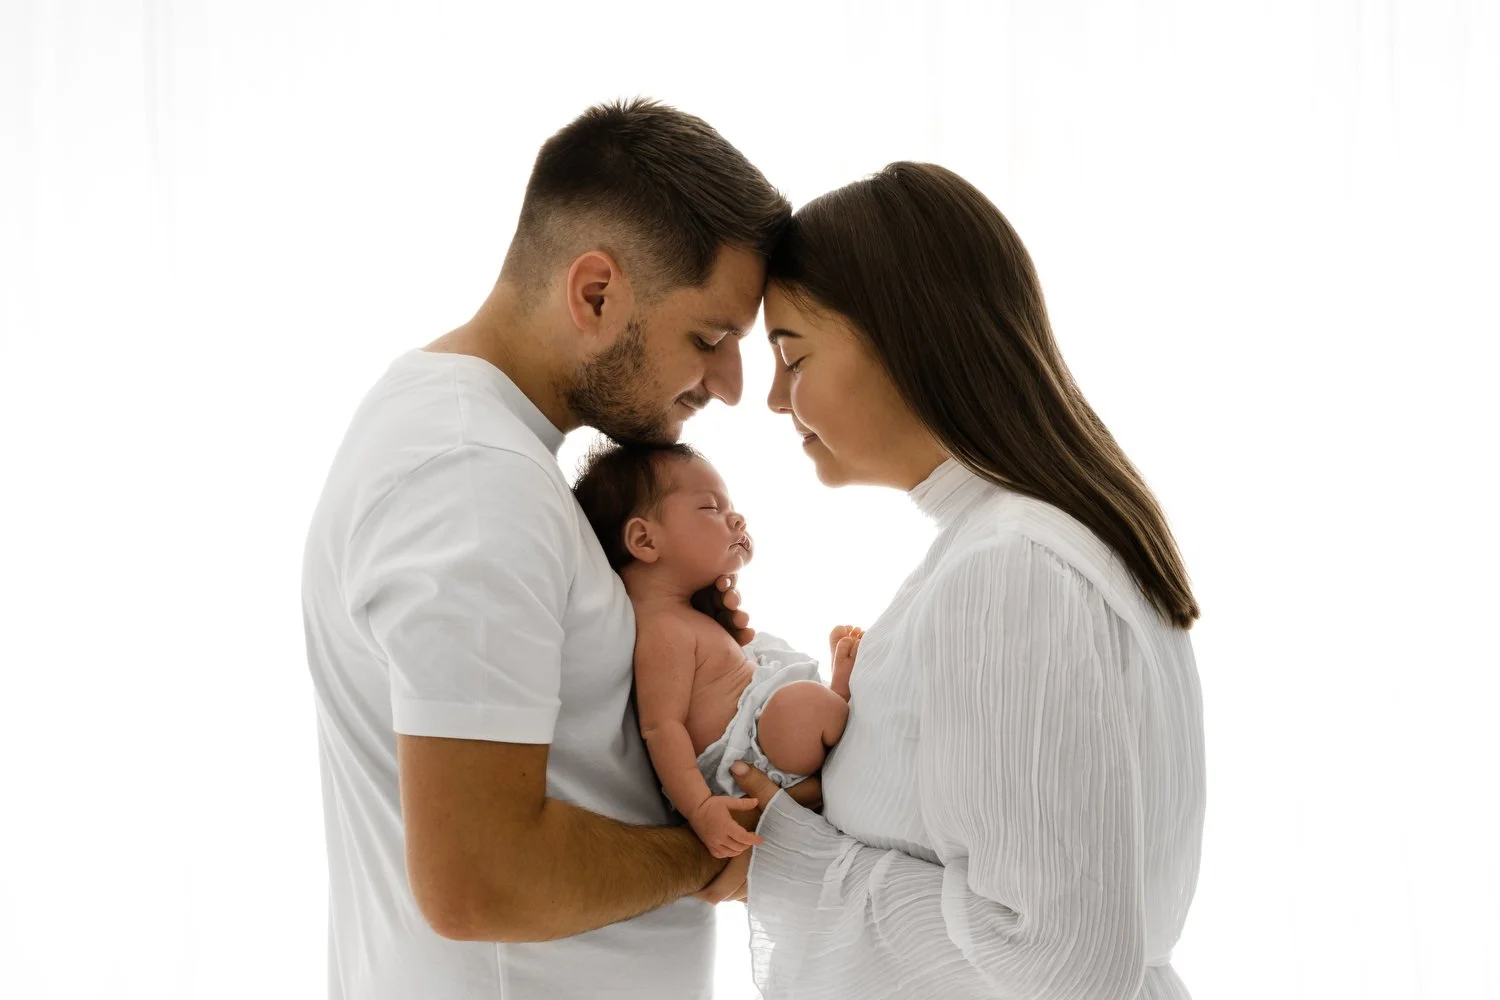
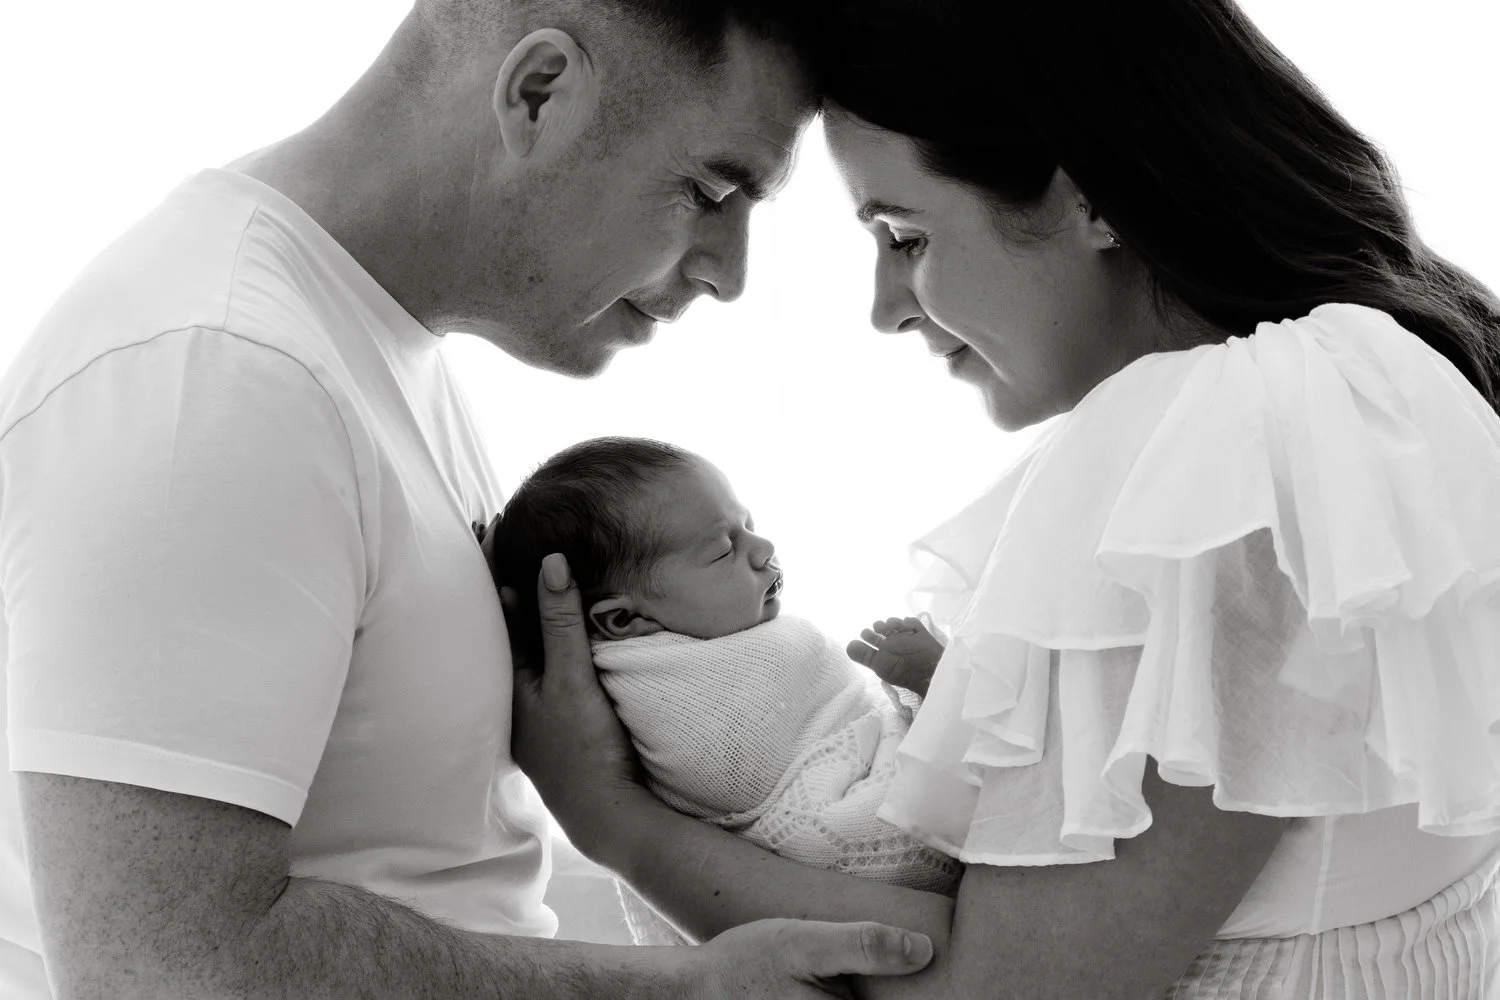
Instead position your subjects so they are facing each other. This means both of them have their faces turned slightly inward and the light wraps beautifully around the sides of their faces and catches their profiles. You can then move your own position slightly to find the angle where you can see both of their faces in profile.
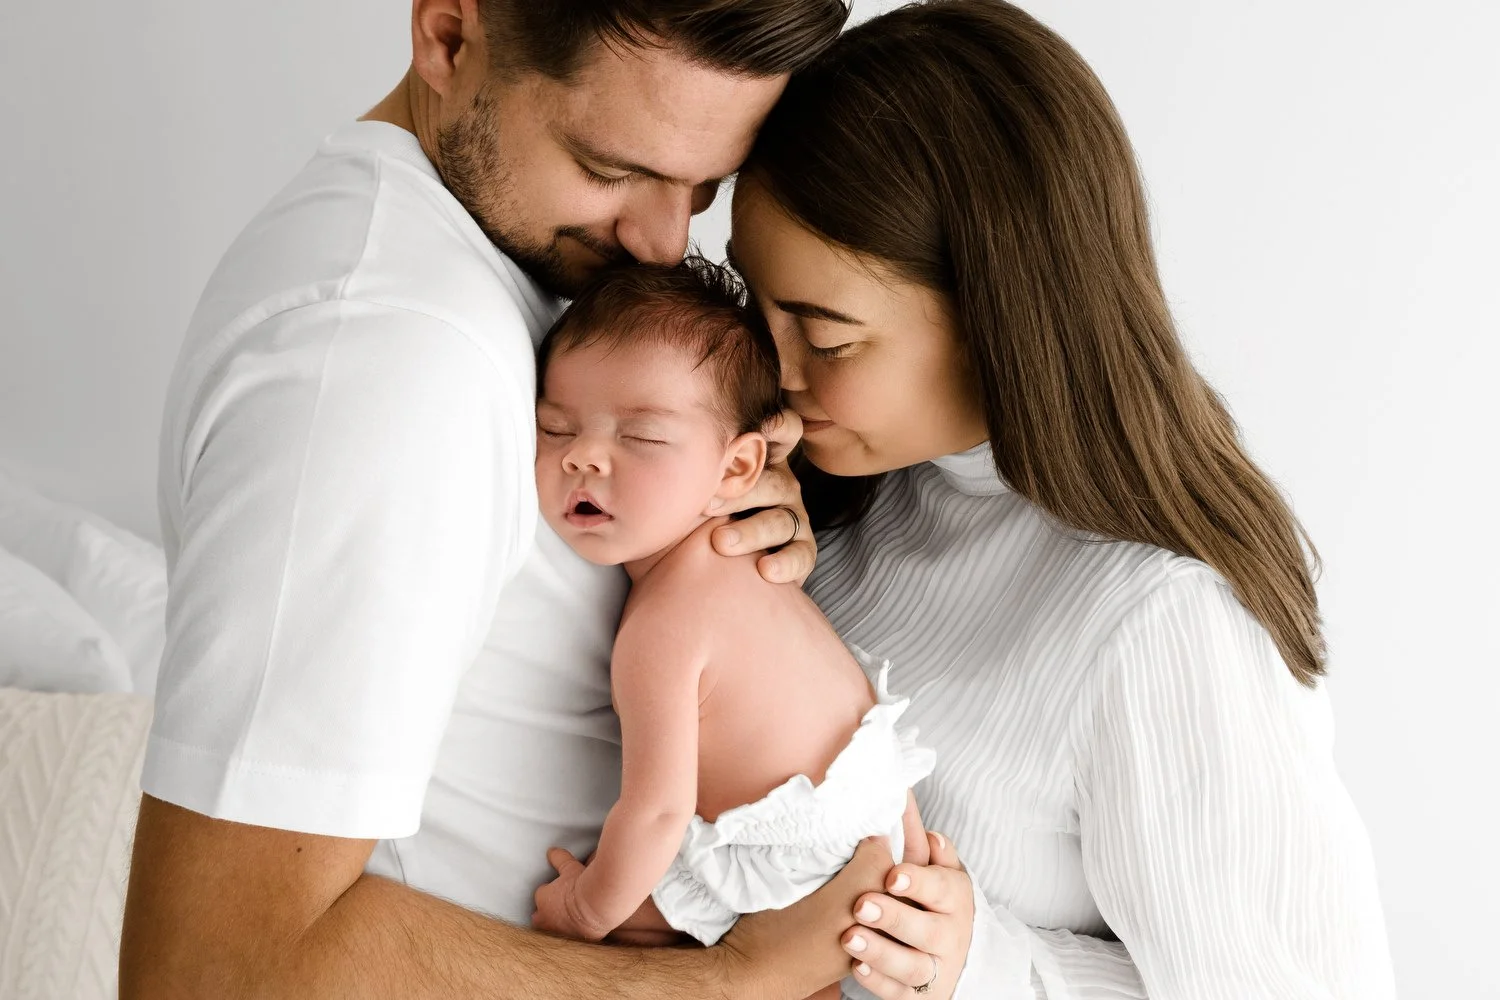
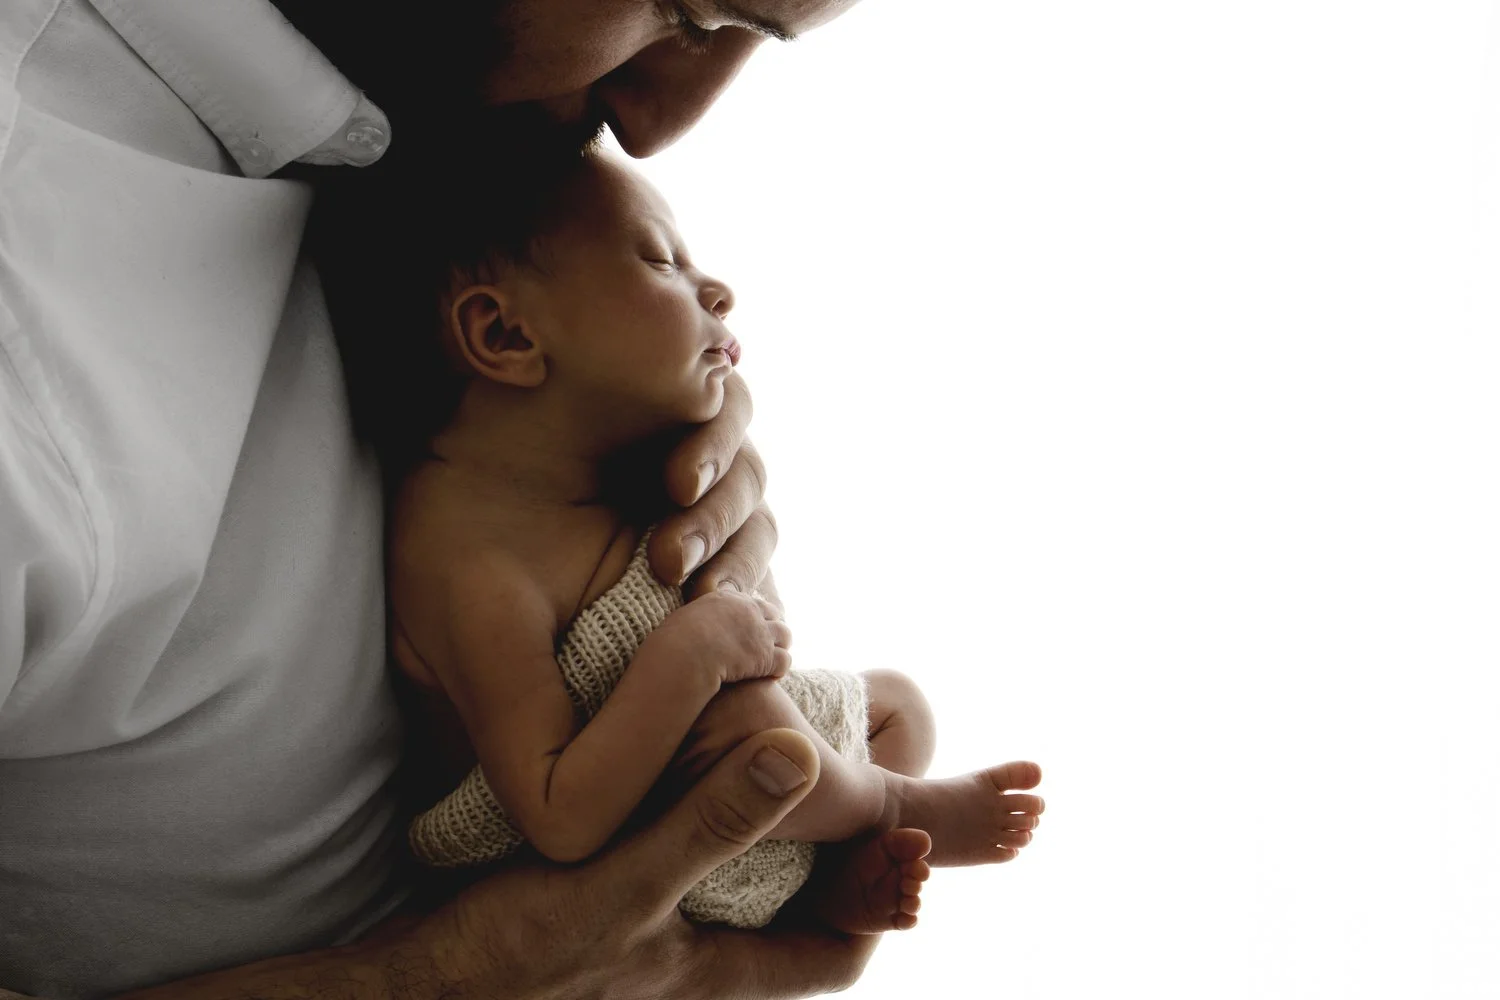
The image at the top of this post and the image below are of the same couple in the same session. In the image below the light is to their side. All I did to create the hero image was ask them to face each other, position them so I could see their profiles clearly and then move my own position. Nothing else changed at all.
Do Not Change Your Camera Settings
This is one of the most common points of confusion for photographers who are new to this setup.
When you move from a standard position to a backlit position your camera settings do not need to change. The power of your light source has not changed. You have simply moved in relation to it.
My settings stay exactly the same for backlit images as for everything else in my studio. Shutter speed 1/125, aperture f6.4. Set your exposure before you move into the backlit position and do not touch it when you change.
What does sometimes need adjusting is in your editing afterwards. The darker areas of the image, most often mum and dad's hair which can appear quite dark against the bright background, can be lifted slightly in editing. Do not be tempted to increase your exposure in camera to compensate. The light has not changed, your position has.

Keep Your Lens Scrupulously Clean
Backlit photography is more unforgiving of a dirty lens than almost any other setup. Any smudge, fingerprint or dust on your lens will show up far more clearly in a backlit image than it ever would in standard lighting. Before you move into your backlit setup take a moment to clean your lens carefully. It takes thirty seconds and it will save you a significant amount of editing time.
Convert to Black and White
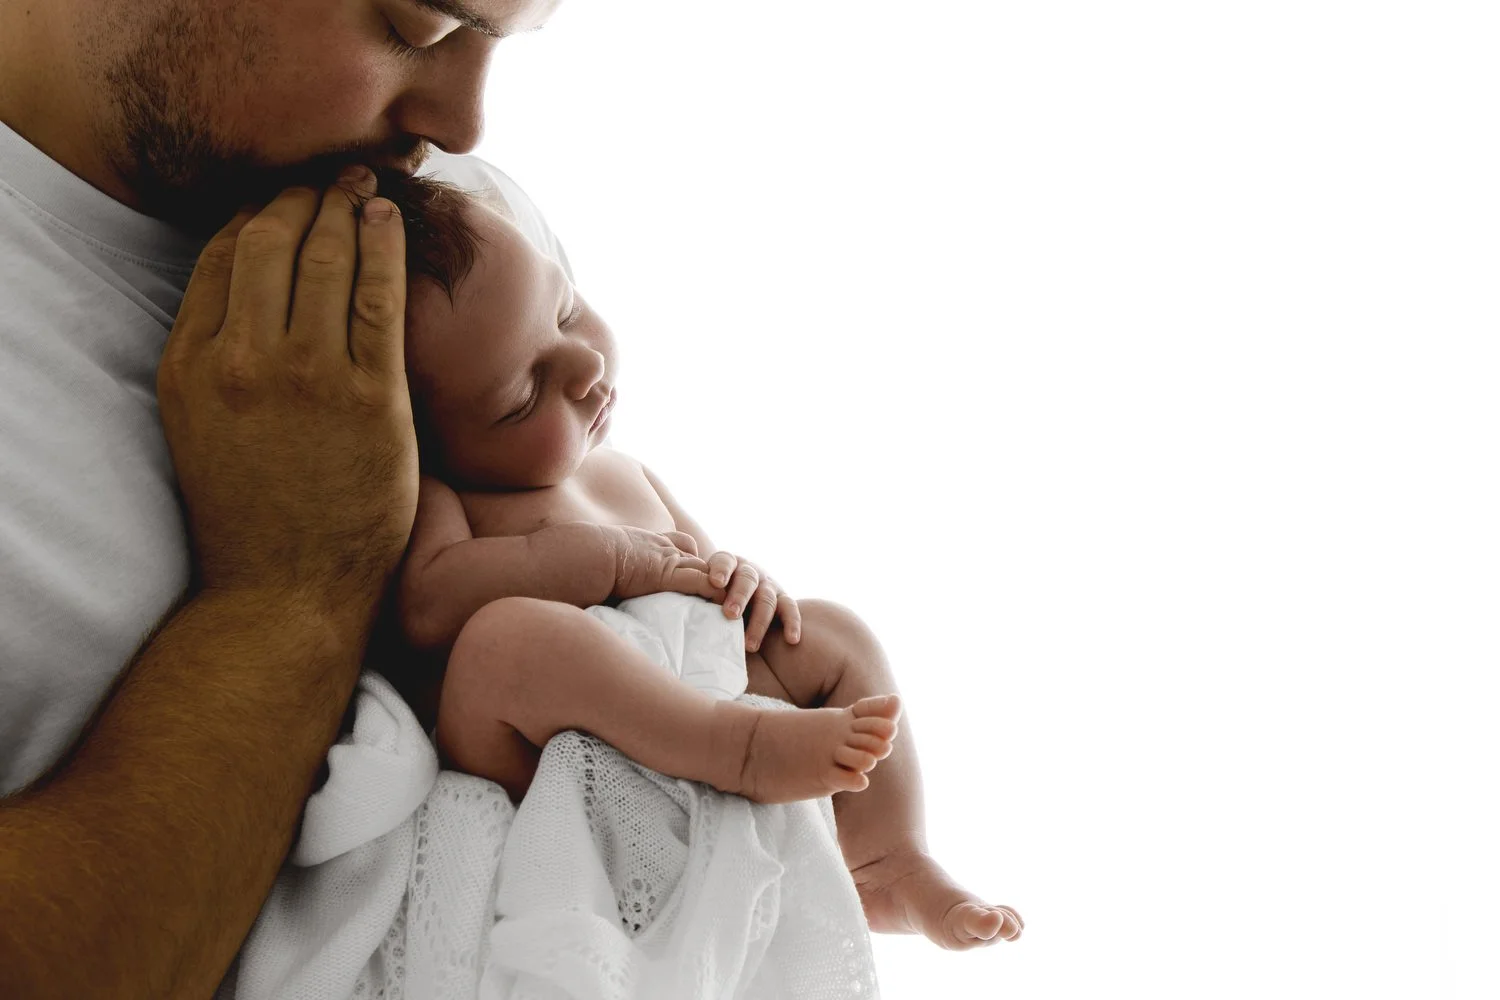
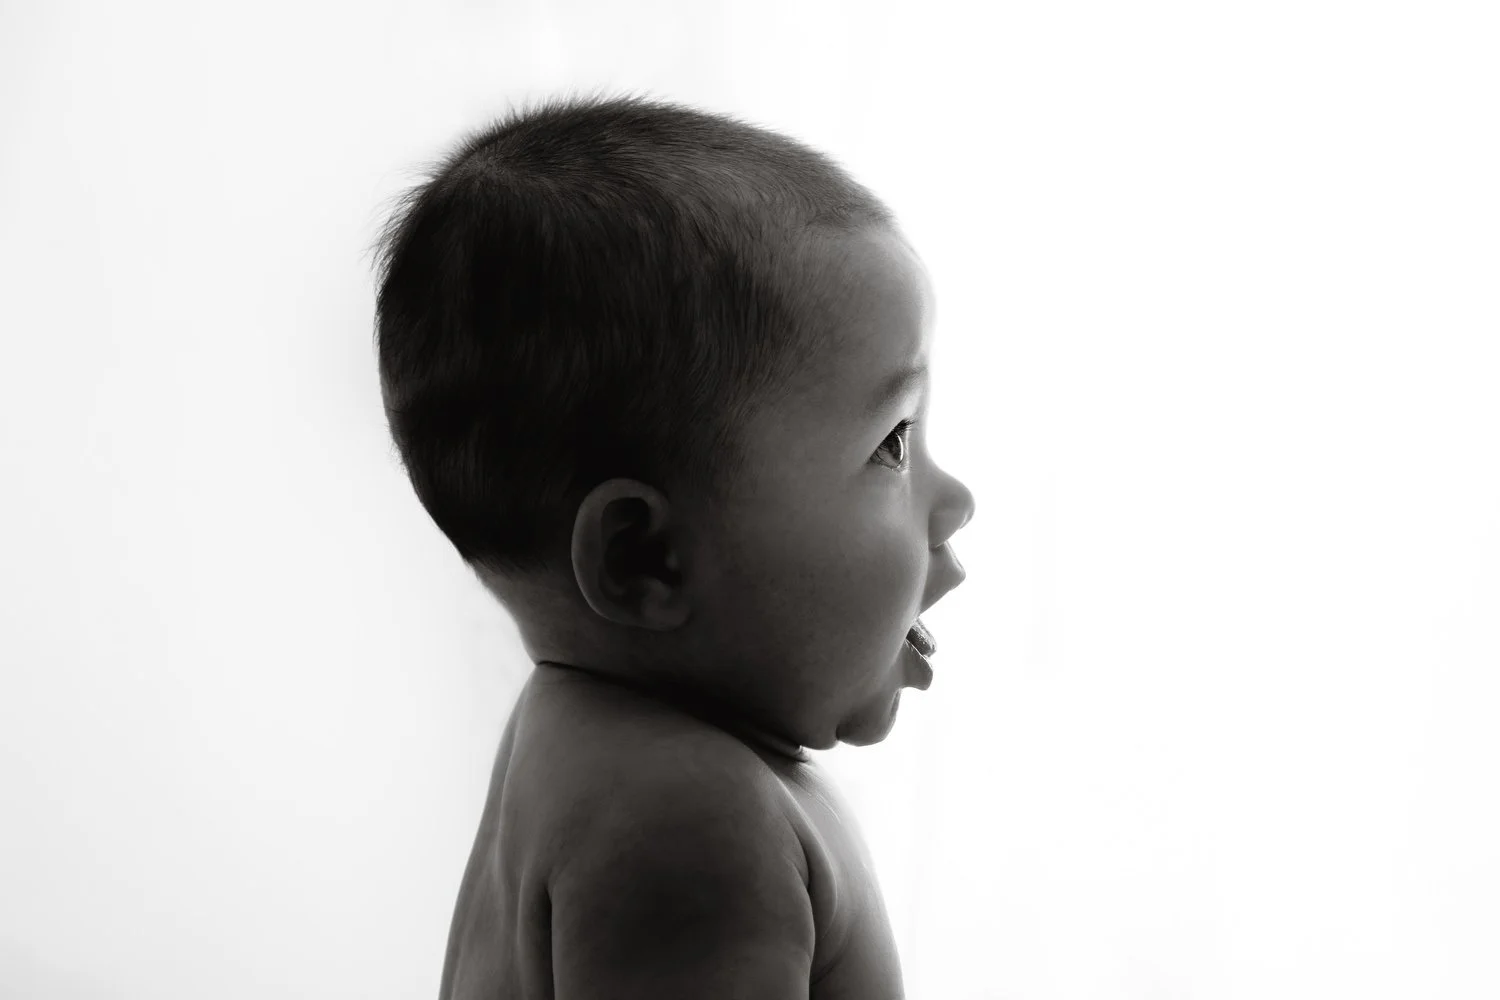
Backlit images convert to black and white beautifully. The reason is the shadow detail. Because the light is coming from behind your subjects there is naturally more shadow on the front of them which creates depth and dimension in the image. When you convert to black and white that depth becomes even more pronounced giving you a punchy dramatic portrait that feels completely different from a standard black and white image.
This is also a wonderful way to give parents variety in their gallery and another reason to add an image to their collection. A colour backlit portrait and a black and white version of the same image feel like two completely different photographs. Parents will often want both.
The Two Most Common Mistakes
The first is a smudge on your lens. Clean it before every backlit setup without exception.
The second is not getting enough profile of your subjects. If your subjects are facing even slightly too far towards the camera or too far towards the light you will lose the beautiful detail of their faces and the image will feel flat. Take a moment to position them carefully, check that you can see both of their profiles clearly before you shoot and adjust your own position if needed. A small change in angle makes an enormous difference in a backlit image.
Backlit images are one of the most requested styles by parents and one of the most rewarding to create once you understand the setup. Start simple, one light source, one layer of voile, one white wall to bounce from and build from there.
If you would like to work through your own specific studio setup with me and get your backlit images looking exactly the way you want them, A One to One Workshop might be exactly what you need. It is a one to one mentoring session where we work through whatever is most relevant to you and your studio.
If you would like to go deeper, my One-to-One Mentoring covers photographing lighting in real practical detail, alongside everything else that goes into building a calm, confident session and a gallery that sells.
If you'd rather start somewhere simpler, The Simple Six Beginners Course is a structured online course you can work through at your own pace.
Start The Simple Six Beginners Course
And the Flow Posing Guides give you ready made session flows so as every session feels relaxed.